
AI 3D Printing: Can AI Make Models That Print?
AI can get you close to a printable shape, but the slicer still gets the final say.
People ask two related questions on 3D printing forums: can AI make a model that a printer can use, and does an AI 3D printer mean a machine that prints from a prompt? The first answer is sometimes yes. The second usually describes a camera or software feature around the printer, not a system that invents a complete object and prints it without preparation.
AI works well for organic shapes that do not need an exact fit. A figurine, display prop, decorative animal or shallow relief can start from one image or a text prompt. A bracket, threaded cap, enclosure or snap fit needs measured dimensions and controlled geometry, so it belongs in CAD or needs careful remodeling after generation.
You will see where AI enters a print workflow, how to judge a generated mesh, and how to use a photo route or a ChatGPT code route. You will also get practical checks for scale, walls, thin details, supports, mesh repair and the three print ideas that make the most sense for an AI-made model.
What an AI 3D Printer Actually Means
The phrase AI 3D printer covers three different jobs. One tool generates a 3D model from an image or a prompt. A printer or slicer can use AI features to watch a job and suggest settings. A product page can also put AI in its name even when the machine still needs a prepared sliced file.
A generator is the part that changes an idea into geometry. It may return a closed mesh, a textured scene or code for a modeling program. You still choose the physical size, orientation, supports and material in the print workflow. No printer prints from a prompt on its own.
A useful mental model is a chain of decisions. The generator proposes surfaces, the mesh tools make the surfaces valid, the slicer turns them into layers, and the printer deposits or cures those layers. Camera checks can spot a problem during the last stage, but they do not repair every geometric decision made at the first stage.
If a product description says AI printer, ask what input it accepts. Look for a camera, failure alerts, automatic calibration, orientation help or support generation. Then ask which file formats the machine reads. That simple distinction keeps a marketing label from creating the wrong expectation about a model-making workflow.
The word printer also hides the difference between a recommendation and an action. An automatic orientation may place a model in a sensible position, yet the best position depends on the visible face, the strength of each layer and the direction of the force the object will receive. A failure alert may tell you to pause, yet it does not decide whether a damaged job is worth saving.
For a new user, the safest question is concrete: which part of the chain is being automated? If the answer is model generation, inspect geometry. If the answer is camera monitoring, inspect the live job. If the answer is slicer assistance, inspect the layer plan. This vocabulary makes the workflow easier to compare and troubleshoot.
The question cluster is small and specific. Most of it is the bare phrase, and a steady share is people asking whether AI or ChatGPT can make a model at all.
- AI 3D printing, 3D printing AI710 searches36%
- AI 3D printer480 searches24%
- AI for or in 3D printing340 searches17%
- Can AI make or generate 3D models220 searches11%
- Can ChatGPT make 3D models140 searches7%
- AI STL editor90 searches5%
Monthly US searches per phrase group, Semrush, pulled 2026-08-21 and 2026-09-14. Shares are of these six groups, 1,980 searches in total.
AI for 3D Printing: Making the Model
AI for 3D printing is most useful at the idea-to-mesh stage. An image-to-3D system estimates depth from one visible view and builds a complete object around that evidence. A text route turns a description into a shape, while a coding assistant can describe the construction of a parametric part in OpenSCAD or Python for Blender.
The input determines the kind of result you should expect. A clear object on a clean background gives the model more useful silhouette information. A drawing or screenshot can work as a reference, but hidden surfaces still need an inspection pass. The output is a starting mesh with a job to complete in the slicer.
For a print, select a triangle mesh path and a sensible face budget. Textures help a digital preview, yet texture tier does not change the printed shape. The shape comes from geometry, scale and slicing. Keep those decisions separate so a pretty surface does not distract you from a weak base or a missing rear feature.
3D Printer AI: Cameras, Failure Detection and Slicers
Printer makers now ship camera-based failure detection. A camera can watch for a loose first layer, spaghetti-like strands, a detached object or a job that has stopped matching its expected appearance. This is useful during a long print because the issue can appear before you return to the machine.
Slicers offer automatic orientation and support generation. They can test several positions, place supports under overhangs and estimate time or material. Those suggestions are starting points. You still inspect contact with the bed, support marks, bridges, thin walls and the layer preview for the chosen material.
A camera cannot see every hidden problem in a mesh. It cannot know that a hole is the wrong size, that the inferred back is inaccurate, or that two printed parts need more clearance. You need a person to define the target dimensions, choose the material, respond to alerts and decide whether a small test is worth running.
AI in 3D Printing: What Is Real and What Is Hype
Real AI help has a narrow boundary. It can estimate a surface from an image, propose a shape from words, repair some mesh defects, suggest a position, generate supports and flag visible failure patterns. Each result can save setup time when you know what to inspect afterward.
The weak point is intent. A generated object may look convincing while its hidden side, wall thickness, hole size or contact face has no reliable relationship to your specification. A camera may flag a dramatic failure while missing a dimensional error that only appears when two parts meet.
Use AI for exploration and for repetitive assistance. Keep direct control over dimensions, mating surfaces, material choices and the final layer preview. That balance gives you a fast first shape and a clear test for whether the shape belongs in a real print.
Where 3D Printing AI Fits in the Workflow
Think about the whole workflow before you choose a generator. The model is only one handoff. A closed mesh can still need scale, repair, orientation, supports and a test print before it becomes a useful object.
AI can contribute at every stage, but its role changes. The largest creative contribution happens when a shape is generated. Later contributions are checks and suggestions. Your decisions become more important as the model moves from a screen to a physical surface.
Keep a copy of the input image or prompt with the exported file. Record the intended height, material and use. Those details help you tell a geometry problem from a slicer setting and help you repeat a successful revision without guessing.
Five stages and what AI does in each
| Stage | What AI does today | What you still do |
|---|---|---|
| Design or generate the model | Builds a mesh from one image, a text prompt or code suggestions; estimates unseen surfaces | Define the object, choose the input, inspect the silhouette and decide whether the geometry matches the intended use |
| Repair and prepare the mesh | Can identify some holes, non-manifold edges, loose shells and support areas | Confirm a watertight volume, remove fragments, set scale, add a base or split lines, and check walls |
| Slice | Suggests orientation, supports and some print settings from the model shape | Choose the material profile, review layers, confirm the first layer, adjust supports and verify the physical size |
| Print and monitor | Camera-based systems can look for spaghetti, a detached print or a first-layer failure | Prepare the bed, load material, respond to alerts and stop the job when the physical result is unsafe |
| Post-process | Can suggest cleanup steps or help plan a finish from a reference | Remove supports, cure or cool the part, sand marks, test strength and compare the result with the intended object |
Can AI Make 3D Models That Print?
Yes, AI can make 3D models that print when the model is an organic object and you accept a check-and-edit step. A generated mesh can have a complete volume, a recognizable silhouette and enough broad surface area for a figure or prop. A successful visual result still needs a physical review at the target size.
The one-view problem matters most on the side the camera never saw. The system sees one projection, then infers surfaces that the image does not show. It may produce a plausible rear curve, a shallow base or a strange transition around a hidden opening. Rotate the mesh before you export the STL.
Printability is also a scale problem. A detail that looks clear in a viewer can be thinner than a nozzle line or too fragile for resin removal. A face budget controls geometric complexity, yet it does not guarantee a minimum wall or a useful clearance. The slicer layer preview is the practical test.
For a part that has to mate with another part, the question changes from can AI generate a model to can you specify every critical dimension. Use measured geometry and parametric relationships for holes, threads, sockets, hinges, clips and enclosures. AI can help with a surrounding concept, while the fitting surfaces need a controlled design.
What a generated mesh gets right and wrong
| Aspect | Usually right | Often wrong | Check |
|---|---|---|---|
| Closed volume | A recognizable outer shell with a printable-looking surface | Hidden gaps, internal shells, flipped faces or intersections can remain | Run a manifold check and inspect a sliced cross-section |
| Silhouette and proportions | The visible outline and broad character of the subject | Small proportions, repeated details and contact points may drift | Compare the full rotation with the reference image |
| The hidden side | A plausible continuation of the visible front | The inferred rear can be flat, soft, hollow or unrelated to the real object | Rotate the mesh and look at the base, rear and hidden openings |
| Thin parts and small holes | Large fins, broad handles and obvious openings | Ears, antennae, hooks, slots and holes can disappear at print scale | Read the layer preview at the intended size |
| Scale and units | A consistent mesh with dimensions that a slicer can import | The file may arrive at an unexpected physical size or need a manual scale | Measure a known feature and set the target height |
| Flat mating surfaces | Large display bases and broad planes | A contact plane can tilt, ripple or fail to sit square | Place the part on the bed and inspect its first layers |
What AI Generated 3D Print Models Get Right
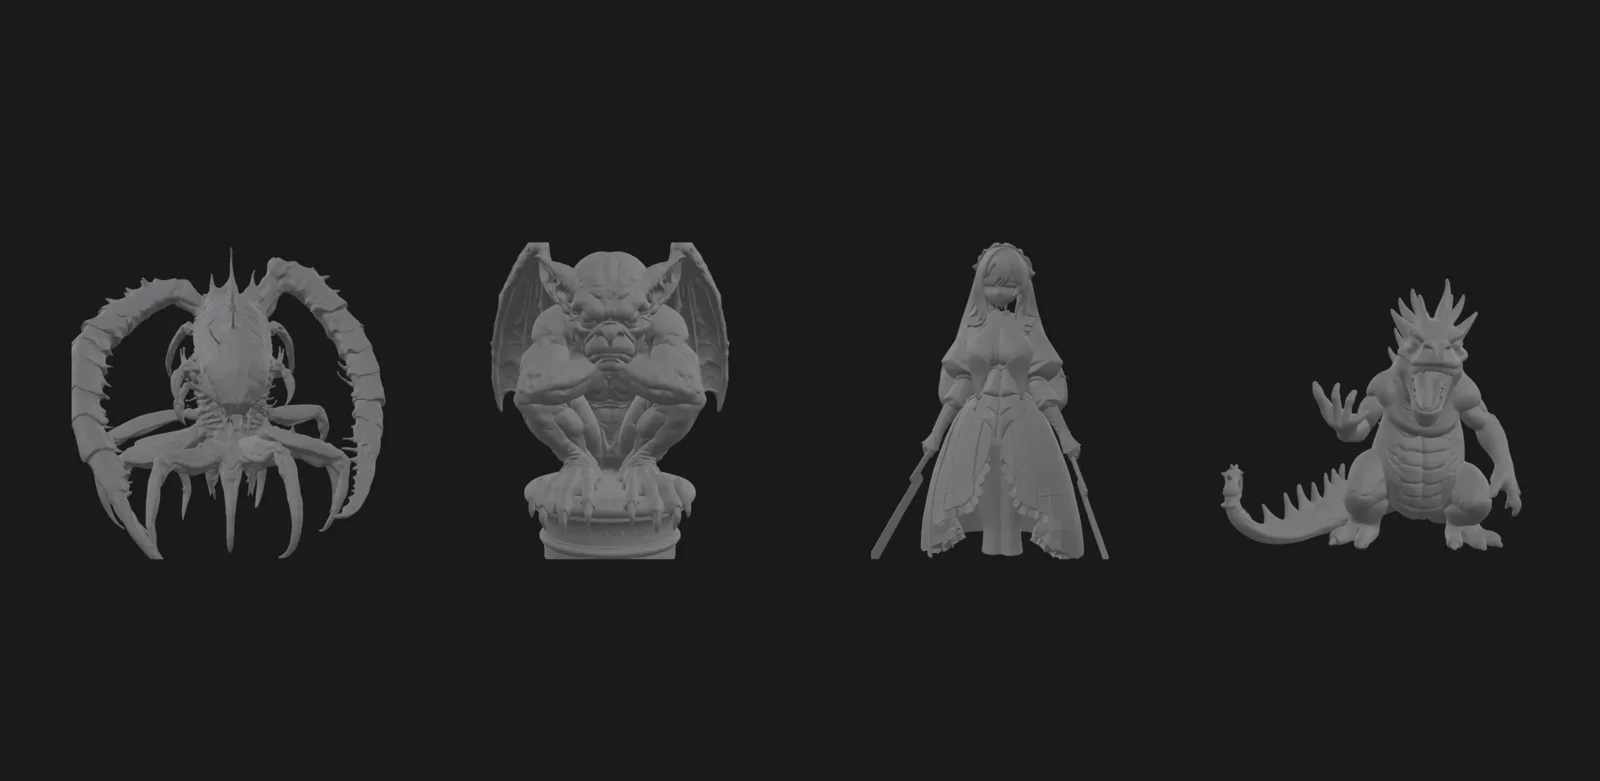
AI generated 3D print models usually do best with visual identity. A face, animal, toy-like creature or carved ornament can be recognizable from its outline and major masses. Those features survive a moderate reduction in detail and remain useful when the final print is small.
Broad curves are also forgiving. A rounded body, a simple cloak, a stone-like ornament or a plant-inspired form can hide small topology changes under primer and paint. You still need to check the base and supports, yet the object does not depend on one exact edge or hole to work.
A closed mesh helps because the slicer can read the outer volume and generate layers. Treat closed as a starting property, not a verdict on quality. Inspect normals, intersections, self-contained fragments and the way the model meets the build plate before committing material.
Texture can make a digital model look finished, but an STL carries no colour. If the object is printed as one material, choose geometry that carries the visual idea through its raised forms, recesses and silhouette. Colour can come later through paint or a multi-material workflow supported by your slicer.
A useful generated mesh has a destination before it has a finish. For a small figurine, the silhouette and the base may matter more than dense surface detail. For a larger prop, the split line, wall and assembly plan may matter more than a texture that will disappear under primer. Set the face budget around the feature you need to preserve.
Keep the original GLB when the texture is valuable for a digital review. Keep the STL as a print derivative with a clear version name. The two files answer different questions: the GLB shows the textured asset, while the STL gives the slicer the triangle surface it needs. Moving between them should not erase your inspection notes.
Backs, Thin Parts and Scale: Where They Go Wrong
The back is the largest uncertainty in a one-image model. A front view can show a cup-like shape while hiding its depth, handle connection or rear opening. The generated result may satisfy the front outline and still fail the object you had in mind when you turn it around.
Thin parts fail in two ways. They may exist in the mesh yet fall below the line width that the printer can place, or they may be connected by a narrow neck that breaks during support removal. Thicken fragile details, add a base, or remove details that do not survive the intended scale.
Scale errors are easy to fix and easy to miss. STL has no unit declaration, and every STL from the Opolyo route is written in millimetres, so confirm the imported dimensions against a known feature. Set the final height in the slicer and recheck the smallest important detail after scaling.
Use the cross-section view for hidden problems. It can reveal an internal cavity, a paper-thin wall or an island that the solid preview hides. A slow review of a few critical layers gives better information than staring at a polished render.
Which Prints a 3D Print AI Generator Suits
A 3D print AI generator suits figures from a photo, decorative animals, organic desk objects, masks, display ornaments and simple cosplay props. These objects are judged mainly by their shape, presence and surface character. A small amount of cleanup can make the result ready for a display print.
Props work well when the part does not carry a precise load. A fantasy handle, creature mask or oversized emblem can be generated, scaled, split and finished by hand. Add a solid base or a controlled connection when the object must stand, hang or attach to a display piece.
Reliefs are another good fit because the intended geometry is shallow. A portrait, logo or plaque can use brightness as height and retain a clear flat backing. This route has a simpler physical problem than reconstructing the complete rear of a figurine.
Do not start with brackets, threads, enclosures or snap fits when the fit is the main requirement. Those parts need dimensions, axes, tolerances and clean mating surfaces. A generated visual may help you sketch the idea, yet the final interfaces should be modeled with controlled geometry.
AI 3D Print Model Generator: Photo or Prompt to STL
An AI 3D print model generator gives you a short path from one reference to a mesh. Opolyo accepts one JPG, PNG or WEBP up to 10 MB per generation, or a text prompt. One clearly visible object on a clean background works best, and a drawing or screenshot can also work when it shows the subject clearly.
For a physical print, choose triangle topology. Triangle output returns GLB, and STL or OBJ are browser-side exports of that triangle GLB. Every STL is written in millimetres and carries no colour. A GLB from another tool goes through the GLB to STL converter the same way. Preview the full model, including the inferred back, before you download the file for your slicer.
From one photo to a sliced print
Pick one clear photo
Choose one JPG, PNG or WEBP up to 10 MB with one clearly visible object on a clean background. A three-quarter view can show useful depth. Drawings and screenshots work when the object is readable and the important outline is visible.
Upload to the image to 3D generator
Send the image to the image-to-3D route. Keep the original image with the project so you can compare the generated silhouette and the inferred rear surfaces during review.
Choose triangle topology and a face budget
Select triangle topology for the print route. A face budget around 100,000 to 500,000 is a common starting point. Increase it when surface shape needs more detail, and lower it when a simpler mesh makes inspection and slicing easier.
Preview the full mesh and the inferred back
Rotate the complete model. Inspect the underside, back, side transitions, thin protrusions, holes, internal cavities and the contact area. A front render is not enough evidence for a print.
Download STL
Export STL for the usual slicer path. Keep GLB when you need the textured digital model, and remember that STL carries no colour. Confirm the downloaded file opens as one intended object before you change its size.
Open in the slicer, scale, orient, support and preview
Set the target dimensions, place the strongest face toward the bed, add supports where the shape needs them and move through the sliced layers. Check the first layer, thin features, bridges, walls and floating fragments before starting the print.
Settings an AI 3D Printer Model Generator Exposes
The useful settings describe the next tool. Opolyo exposes texture quality as Standard, Ultra or Max, topology as triangle or quad, and a face budget from 500 to 2,000,000. Triangle topology is the print choice. Quad topology is useful for an editable model workflow that expects FBX.
For a common print starting point, choose triangle topology and a face budget around 100,000 to 500,000. That range is a practical place to inspect detail without making the file needlessly difficult to move. The right setting depends on the object, the target size and the detail that can survive the nozzle or resin process.
Texture tier affects the digital texture result. It does not change the printed shape. If the next step is an STL, spend attention on the silhouette, face budget, base and mesh checks. A higher texture tier cannot repair a weak inferred surface or a wall that vanishes in the layer preview.
What One Model Costs
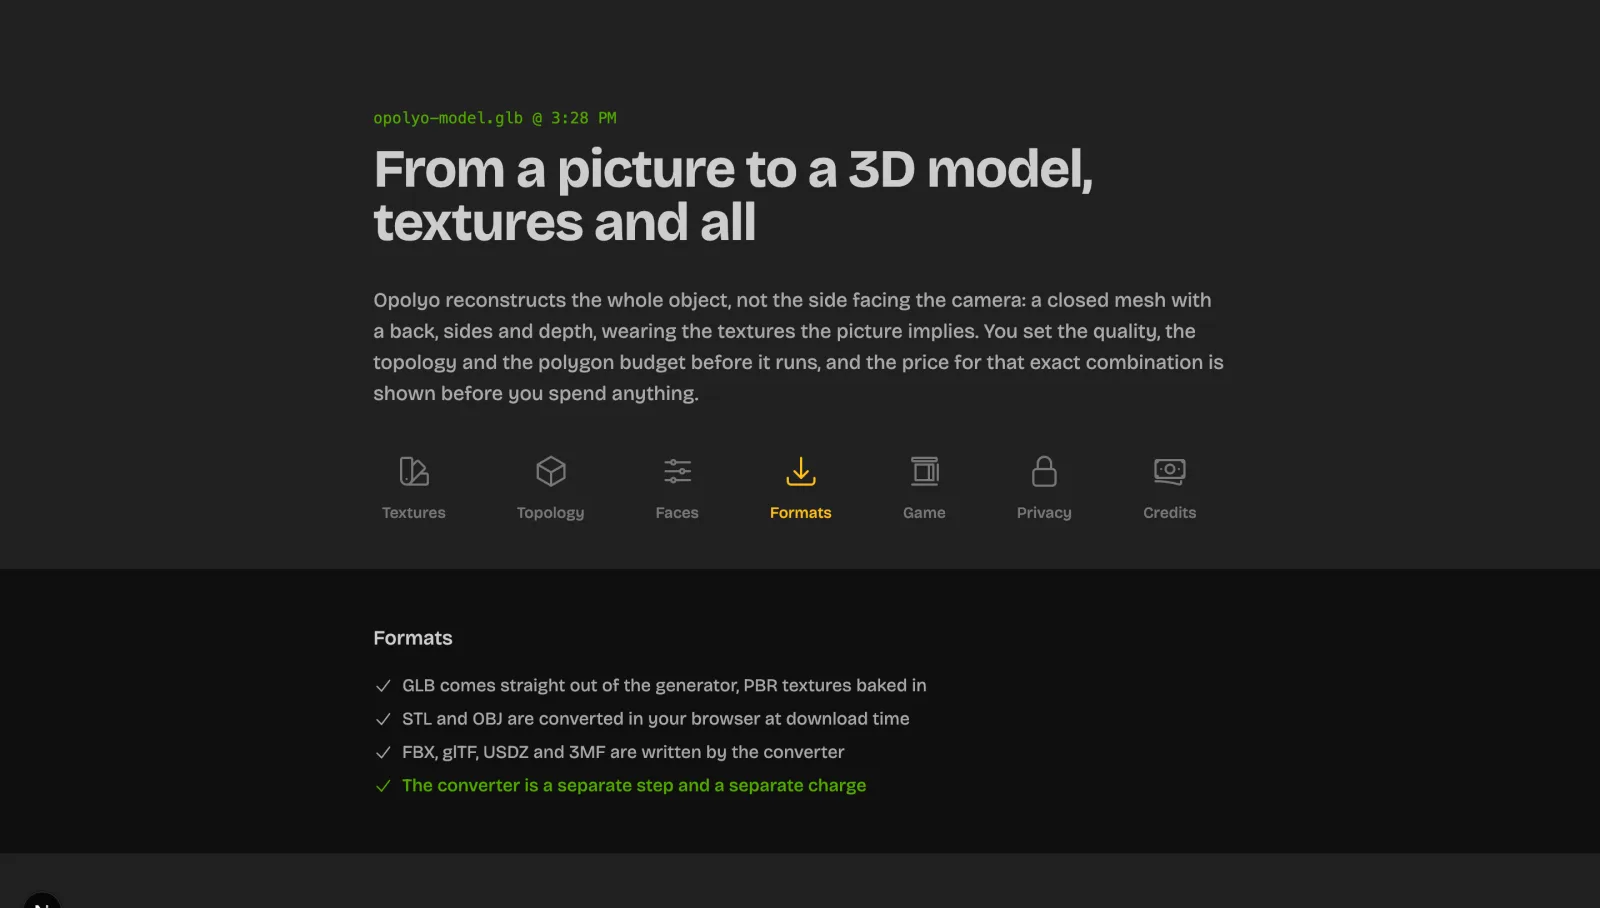
Standard textures cost 10 credits per generation. Ultra or Max textures and quad topology cost more. The polygon budget does not change the price, and the credit figure appears on the button before generating. Credits come from a plan or a pack, and a failed generation refunds its credits.
Generation is usually under three minutes. Every paid plan includes a commercial licence for generated models. Check the licence against the way you plan to publish or sell the model, and keep the generated source and export together with your project notes.
The cost decision is tied to the stage you need. A print preview needs usable geometry and a manageable face budget. A textured asset may need a higher texture tier. A quad result can cost more while serving a different editing path. Pick the output for its destination before you press the button.
Print your first AI model from one photo
Upload one clear picture, choose triangle topology, preview the inferred back and download STL for the slicer.
Can ChatGPT Make 3D Models?
ChatGPT can make 3D model code, plans and prompts. It can write OpenSCAD for a parametric solid or Python that drives Blender, then you run that code in the modeling application and export a mesh. A chat response does not itself become an STL until a tool evaluates the instructions and writes the geometry.
The code route is strong when you can describe dimensions. A spacer, tray, box, stand or simple adapter can be expressed with named variables and repeatable operations. You can revise a diameter or height without sculpting the whole shape, then regenerate and compare the new result in the slicer.
The picture route is stronger for an organic shape that is hard to describe with primitives. You give an image to an image-to-3D generator, inspect the inferred surfaces and export the triangle result for a print. ChatGPT can help make a checklist or suggest an edit, but the dedicated generator handles the image-to-mesh conversion.
People reporting their workflows on forums tend to describe ChatGPT as a useful assistant for code, troubleshooting and iteration. They also describe failed booleans, missing variables and dimensions that need correction. Treat the generated code as a draft you can read, preview and test.
ChatGPT to OpenSCAD to STL
A chatbot for making STLs is most useful when you ask for a transparent construction. Give the part dimensions, request named variables, run the code in OpenSCAD, and inspect the exported STL in the slicer. The loop is quick for a part with measured geometry because one value can drive several related features.
Turn a chat answer into an STL
Describe the part with dimensions
State the overall length, width and height. Add hole diameters, wall thickness, clearances, corner radii and the material or printer constraints that matter. Say which faces must be flat and which features must align.
Ask for OpenSCAD code with named variables
Request readable code with variables at the top, simple modules and a short explanation of the coordinate system. Ask the model to keep critical dimensions separate so you can change one number without rewriting the shape.
Paste into OpenSCAD and preview (F5) then render (F6)
Use F5 for a quick preview and F6 for a full render. Look for missing unions, unexpected holes, overlapping solids and a part that is oriented on its side. A rendered view is useful, but measure a known feature too.
Export STL
Export the rendered object as STL. Keep the source code beside the STL and include the intended units in the file name or project notes. Open the exported mesh in a separate viewer to catch an export issue before slicing.
Check in the slicer and iterate on the variables
Set the target scale, inspect the layer preview and test the fit with a small section when needed. Change one variable at a time, rerun the code and compare the new layers with the prior version.
Can Gemini, Claude or Midjourney Generate 3D Models?
Gemini and Claude can help plan a model, write OpenSCAD, and write Python for Blender. They can turn a description into a sequence of operations and help you reason about dimensions. You still need to run the code, preview the mesh and export the resulting file.
Midjourney and other image generators make pictures, not a ready-to-slice mesh in the ordinary image workflow. The picture can become an input for an image-to-3D tool when the silhouette and subject are clear. Keep the generated image focused on one object if the next step relies on a single view.
Choose the assistant by the task. Use a chat assistant for a parametric plan, a code revision or a diagnostic checklist. Use an image generator for visual exploration, then send a suitable image to a dedicated 3D route. Use the slicer as the final physical judge.
The face budget is the setting that changes what the slicer has to chew through. These sizes were measured on the lizard sample model at two face counts. The STL sizes follow from the binary STL format, which stores 50 bytes per triangle plus an 84-byte header.
Measured 2026-09-15 on the lizard sample (835,716 and 417,858 triangles). The GLB includes three texture images; the STL carries geometry only, so halving the faces halves the STL.
Fixing an AI Generated Mesh Before You Print
A generated mesh deserves the same preparation as any other mesh. Check whether it is manifold, whether its normals point consistently, and whether small fragments are part of the intended object. Then check the physical dimensions and the way the base meets the bed.
Start in the slicer because it shows the problem in the context of layers. A missing region, a floating island or a wall that disappears is easier to understand after slicing. Return to a mesh editor when the geometry itself needs repair, thickness or separation.
Repair is appropriate for local defects. Regeneration is appropriate when the hidden surface is fundamentally wrong, a major feature is missing, or the input image did not show enough evidence. Use a clearer photo with a clean background and one visible subject when you make another generation.
Do not let the word repaired hide a changed object. Compare the repaired surface with the intended silhouette and keep a version of the original export. A small correction should preserve the form. A large automatic change deserves a fresh inspection from every side.
Symptom, fix and tool
| Symptom | Fix | Tool |
|---|---|---|
| Non-manifold edges | Find open boundaries, merge or delete stray geometry, recalculate normals and confirm one closed volume | Slicer repair, Blender 3D Print Toolbox or another mesh repair tool |
| Holes in the surface | Fill the opening with a surface that follows the surrounding shape, then inspect the new faces and thickness | Blender or the slicer's repair command |
| Model too small or too large | Measure a known feature, set the target dimension and verify the units after import | Slicer scale controls and a dimension readout |
| Solid model wastes resin or filament | Hollow where the object allows it, add suitable drainage for resin and keep walls within a typical starting range | Slicer hollowing tools or a mesh editor |
| Part too big for the bed | Scale within the design goal or split the model along a strong plane with alignment features | Slicer arrangement and a mesh editor |
| Floating fragments | Delete accidental islands, join intended pieces and ensure every retained fragment has a print purpose | Slicer layer preview and Blender |
A generated mesh with a large face budget produces a large STL, and every slicer has to load all of it. The relationship is exact: a binary STL is 50 bytes per triangle plus an 84-byte header.
Computed from the binary STL format (50 bytes per triangle plus an 84-byte header). A desktop print rarely needs more than the 100,000 to 500,000 range.
Repair STL Files That Will Not Slice
When an STL will not slice, start with the slicer's repair feature and read the warning it gives you. Common causes include non-manifold edges, holes, flipped normals, internal faces and self-intersections. A repair can close a local defect, but you should inspect the resulting layers before you trust it.
Blender's 3D Print Toolbox can help you find mesh issues and review the checks that matter for a printable shell. Meshmixer is another familiar option for closing holes, making a shell and removing unwanted pieces. Use the smallest correction that restores the intended volume.
Regenerate with a better photo when the problem is a bad inference. A repair tool cannot recover a rear handle that was never visible, a correct thread profile or a missing structural connection. Use a clearer subject, a clean background and a view that exposes more of the important outline.
After repair, inspect both the exterior and the cross-section. Confirm there is no hidden shell, no empty gap at the base and no region that changes from solid to absent across adjacent layers. Save the repaired STL with a version label so the source remains available.
Hollowing, Scaling and Splitting
Hollowing can reduce material and weight for a large decorative object. For resin, plan openings so uncured material can leave the cavity and so the shell can be cleaned. For filament, a hollow form needs a useful wall, a stable base and a path that the slicer can actually bridge or close.
Scale from a known dimension, not from the apparent size of the screen preview. Set the intended height or width, then revisit the small features at that scale. A feature can move from visible to unprintable when the whole model is reduced, and a thin wall can become expensive or slow when it is enlarged.
Split a large prop along a simple, strong seam. Add alignment features when the pieces must assemble, and keep the seam away from the most visible surface when possible. Test the fit of the split pieces before you apply a finish across the join.
Use a flat cut for a display piece when that gives the bed a stable footprint. An organic mesh may need a new base or a separate pedestal. Make the cut deliberate and inspect the new boundary for open edges before export.
3D Printer Supports for Organic AI Shapes
Organic AI shapes often have many small overhangs. Tree supports can reach branches, ears, horns and other separated regions with a lighter network of contact points. They still leave marks, so place the visible face away from the densest support area when the shape allows it.
Orientation controls the result. Put the broadest stable surface near the bed, keep delicate projections supported by a short path, and rotate the model so important facial or decorative surfaces do not carry unnecessary scars. Use a base when the natural shape has no stable contact area.
A chamfer can turn a sharp underside into a gradual transition. It can reduce support demand and make a generated shape easier to print. Split the object when one orientation forces supports into every visible region. A small seam is often easier to clean than a forest of marks.
Preview the support tips and the layers below them. Check that each island has a path to the build plate or to a supported region. Then print a small test of the most delicate area, especially when the final object will be tall or difficult to reach during cleanup.
Have a mesh already?
Convert a GLB or OBJ to STL in the browser, or turn a flat image into a relief for a plaque or lithophane.
AI vs CAD vs Scanning for a Printable Part
AI 3D modeling is a good first route when your evidence is a picture and your target is a visual object. CAD is the dependable route for dimensions, holes and mating surfaces. Scanning is useful when you have a real object and want to capture its observed shape and size.
Each route leaves a different kind of uncertainty. AI infers hidden surfaces, CAD asks you to define them, and scanning records a physical example that may still need cleanup. Match that uncertainty to the consequence of failure. A display figure can tolerate a soft rear curve; a replacement cover cannot.
Three routes to a printable part
AI image to 3D
An image becomes a complete mesh through an image-to-3D workflow.
- Starts from one clear picture
- Good for organic silhouettes, figures and display props
- Can reach a closed triangle mesh quickly
- The hidden side is inferred
- Exact fits and small functional features need manual control
Best for: Figures and props from a picture
CAD modeling
Dimensions and relationships define the solid or mesh.
- Controls holes, threads, walls and clearances
- Parametric variables make revisions repeatable
- Best for parts that must fit
- Needs more deliberate modeling work
- Organic surfaces can take longer to shape
Best for: Parts that fit
Scanning
A physical object is captured as measured surface data.
- Uses an existing real object as evidence
- Useful for copies and irregular surfaces
- Can preserve observed proportions
- Needs access to the object and a capture session
- The mesh still needs cleanup, scale and print checks
Best for: Copies of real objects
Our take
Use AI image to 3D for a picture-led figure or prop, CAD for a part with a required fit, and scanning for a copy of a real object. A hybrid workflow can use AI for a visual concept and CAD for every surface that carries a mechanical requirement.
The best route is the one whose uncertainty matches the print. Test the smallest important feature in the slicer before you spend time on finishing.
3D Print Ideas That Work With AI
Keep your first AI-made print in one of three families: a figurine from a photo, a cosplay or display prop, or a lithophane or relief. Each family benefits from a strong visual reference and has a manageable physical review. Each also gives you a clear way to decide what can be corrected after generation.
Choose the input for the family. A photo with a visible silhouette suits a figurine. A front or side reference with a clear outline suits a prop. A high-contrast image suits a relief. Then choose the checks for the final object: stability, scale, support marks, backlight or assembly.
The reference should show the feature you will judge. If the feature is a face, make the face legible. If the feature is a crest or mask outline, keep its boundary clear. If the feature is a logo, use a high-contrast source for the relief route. The generator can only preserve evidence that the input supplies.
Avoid making the first project depend on a hidden mechanism. A decorative object lets you learn how a mesh, slicer and material behave. Once you understand that loop, you can use the generated result as a visual reference for a measured design with the fit-critical features rebuilt.
AI print ideas become practical when you design the handoff. Decide where the model sits, what face touches the bed, whether it needs a base, how it will be finished and what detail can survive the material. These decisions are part of the print idea, not cleanup after the idea.
Make a small version first when the object is tall, delicate or expensive in material. A test can reveal a weak ankle, a soft horn, an unreadable relief or a seam that needs to move. Revise the model or its orientation while the cost of a mistake is still small.
Plan the finish before you choose the orientation. Sanding, priming and painting can hide shallow texture, but they cannot restore a hole that vanished or a support scar on a focal feature. Mark the surfaces that must stay clean, then use the slicer preview to put supports in less visible areas.
A good workflow has a stopping rule for inspection. Check the complete rotation, the target dimensions, the smallest important feature and the first few layers. If those checks pass, a small test can answer the remaining material and surface questions without turning every print into a long modeling project.
Figurines From a Photo
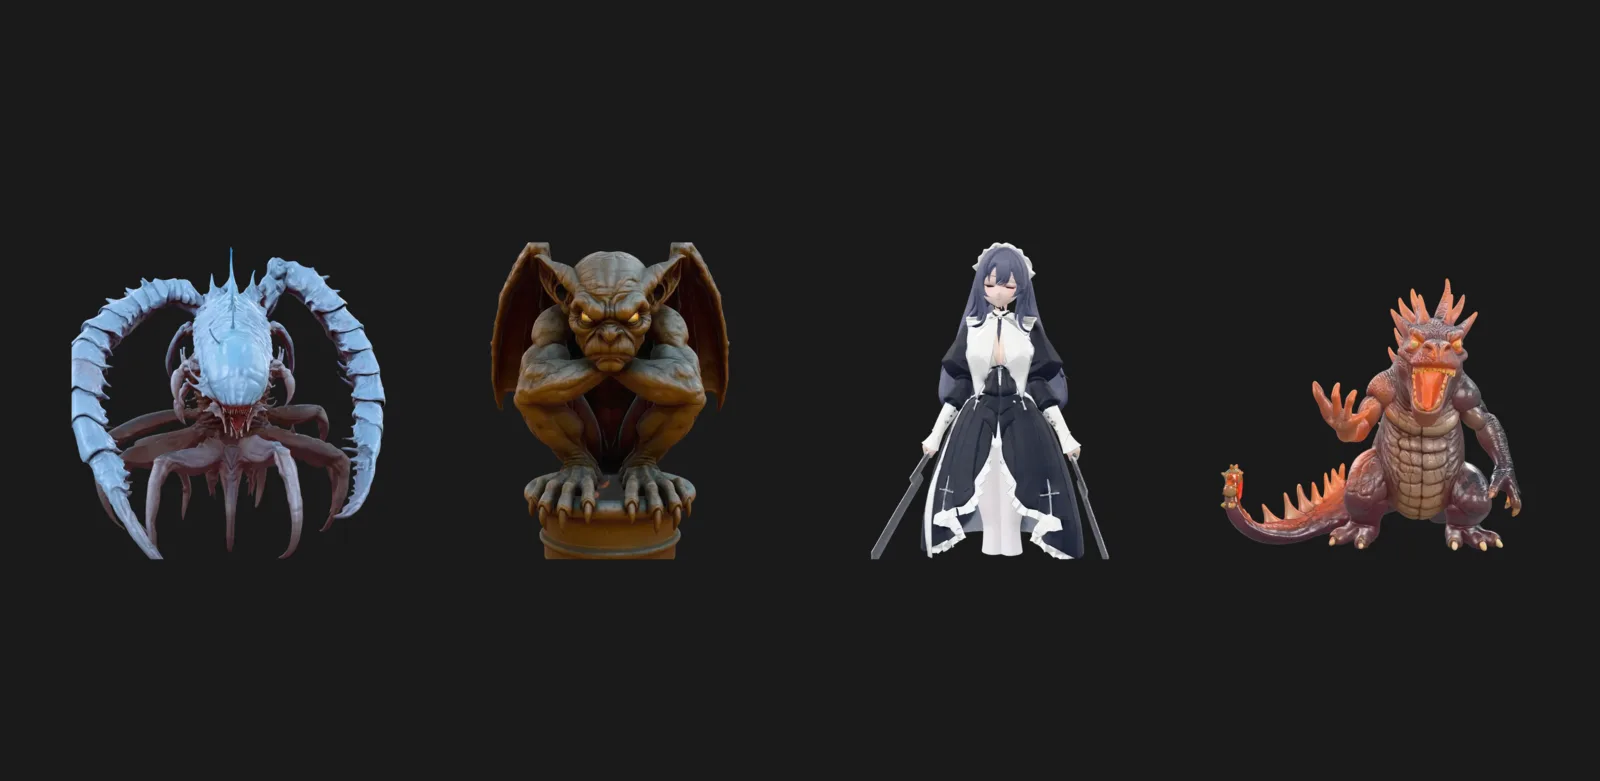
For a 3D print figurine, use one clear photo with the subject easy to separate from the background. A three-quarter view can communicate the body depth and the relationship between the head, torso and base. The image-to-3D route can produce the organic form, then you review the hidden side.
Give the figurine a stable base or add one after generation. Thin fingers, ears, tails and props need attention at the intended size. Thicken a fragile connection, simplify a detail that will vanish, and check the layer preview for islands that have no reliable support.
Print a small proof before painting the final version. Look at the face, silhouette, base contact and the details you care about most. If the hidden side is wrong, use a better reference or edit that area in a mesh tool. The front view alone will not fix it.
Cosplay Props and Display Pieces
For 3D printed cosplay, start with a reference that shows the prop's outline and the surfaces you want to display. Organic armor ornaments, creature masks, fantasy handles and emblems can take a generated mesh well when exact load-bearing connections are not the goal. Decide the finished scale before you judge detail.
Scale up large props in sections. Split along a seam that is easy to align and hide, then test the assembly before sanding or coating. Hollow a large form when the material and finish permit it, keep the walls strong enough for handling, and plan access for cleanup.
Supports and orientation affect finish quality. Keep the most visible face away from support contact, add a base or a flat cut where the object needs stability, and use chamfers at sharp undersides. Inspect the part at the final scale because a smooth small preview can reveal rough layers after enlargement.
Treat wearable or handled parts with care. Check edges, attachment points and strength in the printed material. If a component must fit a measured body, connector or mechanism, remodel the interface with dimensions after the visual shape is generated.
For a display piece, the base is part of the design. A broad flat contact can reduce wobble and simplify supports. A separate stand can let you rotate the main object into a better print orientation. Keep the base intentional, because an accidental flat cut can change the character of the prop.
Large pieces also magnify surface errors. A soft curve that disappears at small scale can become a visible dip after enlargement. Use a primer and sanding plan for cosmetic defects, while rebuilding deep cavities, sharp seams and weak joints in the mesh before you print the final section.
Lithophanes and Reliefs
A 3D print lithophane uses thickness to change how much light passes through the plate. A high-contrast portrait or illustration gives the relief converter a clear brightness map. A relief can also work as a plaque or logo when you need raised height from a flat image.
The relief converter on the Image to STL page runs in the browser and needs no account or upload. Brightness becomes height, the result is a closed solid in millimetres, and the dimensions and triangle count appear before download. It is designed for lithophanes, plaques and logos.
Use a backlight behind a lithophane and keep the plate thin enough for the chosen material to show tonal changes. Add a frame or feet when the plate needs to stand. Check the first layers and the top surface so the image remains legible after slicing.
The converter is wrong for figurines because it creates a relief from brightness, not a complete object. Use the image-to-3D model route for a full shape. Use the relief route when the image itself is the subject and a shallow solid is the intended result.
Choose the plate direction with the light source in mind. A wall-mounted relief can sit nearly flat, while a small lithophane may need a frame or feet that hold it upright. Preview the thickness changes after slicing so the bright and dark regions are represented by enough layers to remain distinct.
A relief also rewards a clean boundary. Remove distracting background areas from the source image when they are not part of the design. Check the dimensions before download, then test a small plate with the intended light behind it. The physical test tells you more about contrast than a flat screen preview.
See what one model costs
Standard textures are 10 credits per generation and the price shows before you press generate. Plans start at $19.99 per month.
AI 3D Printing FAQ
Yes. AI can generate a closed mesh for figures, props, organic decor and reliefs. Check the inferred back, thin parts, scale, manifold state and sliced layers before printing.
ChatGPT can write OpenSCAD or Blender Python code that a modeling application turns into geometry. You still need to run the code, export an STL, and inspect the file in a slicer.
The phrase can mean a model generator, camera-based failure detection, or slicer assistance. A printer still needs a prepared and sliced model file, so it does not print a prompt on its own.
It is useful for generating organic shapes, suggesting supports and spotting some visible failures. It does not replace dimension checks, mesh inspection, material choices or a layer preview.
They can be closed, but you should verify that the mesh is manifold. Look for open edges, flipped normals, internal faces and self-intersections before slicing.
AI-assisted and automatic repair can help with local holes, stray fragments and some edge problems. If a hidden surface or important feature is wrong, use a better input or remodel that area.
A render cannot prove how a model was made. Inspect the topology, hidden surfaces, repeated artifacts, thin details, texture seams and the project record that identifies its input and generation route.
It can help explore the form, but exact interfaces need measured dimensions and controlled clearances. Use CAD or remodel the holes, threads, enclosures and snap fits before relying on the print.
Opolyo returns a triangle GLB for triangle topology and an FBX for quad topology. STL and OBJ are browser-side exports of the triangle GLB, and STL carries no colour.
Standard textures cost 10 credits per Opolyo generation. Ultra or Max textures and quad topology cost more, the polygon budget does not change the price, and the figure appears on the button before generation.
Check the licence for the plan and tool that produced the model, plus rights in your input. Every Opolyo paid plan includes a commercial licence for generated models.
You do not need a scanner for a one-photo visual model. Scanning is useful when you need a copy of a real object or observed dimensions, while AI infers hidden surfaces from its input.
For one photo, Opolyo is the focused choice because it has a single-image route and a clear triangle-to-STL path. For the full comparison, read the Best AI 3D Model Generators post, which compares nine tools by job.
Sources and References
- OpenSCAD User Manual (accessed 2026-09-15)
- Blender Manual, 3D Print Toolbox add-on (accessed 2026-09-15)
- STL (file format), Wikipedia (accessed 2026-09-15)
- Khronos Group, glTF overview (accessed 2026-09-15)
Take the model to the printer
Opolyo user
Jaxon uses Opolyo for his own models and writes about what he runs, on the same plans and the same credits as everyone else.
Print your first AI model from one photo
Upload one clear photo, choose the texture and topology, then inspect the complete model before you download it.